Setup & Installation
Getting the HAT running involves plugging it in, enabling the right kernel overlays, and installing a handful of packages. The whole process takes about ten minutes.
Hardware Setup
Section titled “Hardware Setup”-
Power off the Pi completely. Disconnect the power supply.
-
Align the HAT with the Pi’s 40-pin GPIO header. The board should overhang the Pi with the screw terminals facing outward, away from the USB/Ethernet ports.
-
Press the HAT firmly onto the header pins. All 40 pins should seat fully.
-
Reconnect power and boot the Pi.
Enable SPI for CAN
Section titled “Enable SPI for CAN”The MCP2515 CAN controller connects to the Pi over SPI. You need to enable SPI and load the device tree overlay that tells the kernel how the chip is wired.
On Raspberry Pi OS Bookworm and Ubuntu 23.10+, the boot configuration lives at /boot/firmware/config.txt.
sudo nano /boot/firmware/config.txtAdd the following lines at the end of the file:
dtparam=spi=ondtoverlay=mcp2515-can0,oscillator=12000000,interrupt=25,spimaxfrequency=2000000On Raspberry Pi OS Bullseye and earlier, the boot configuration is at /boot/config.txt.
sudo nano /boot/config.txtAdd the following lines at the end of the file:
dtparam=spi=ondtoverlay=mcp2515-can0,oscillator=12000000,interrupt=25,spimaxfrequency=2000000Reboot after saving:
sudo rebootEnable UART for RS-485
Section titled “Enable UART for RS-485”The RS-485 transceiver uses the Pi’s hardware UART. You need to enable the serial port hardware while disabling the kernel’s login shell on that port (the two are configured separately).
-
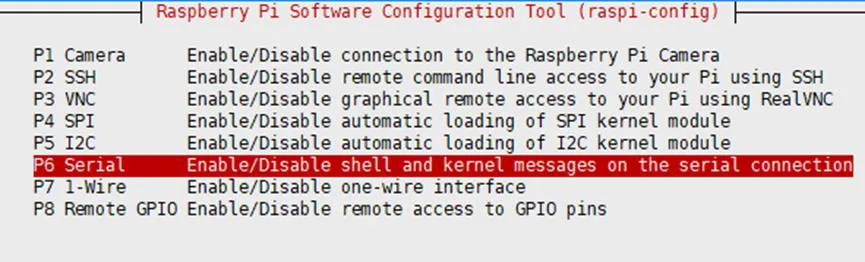
Open raspi-config:
Terminal window sudo raspi-config -
Navigate to Interface Options then Serial Port.
-
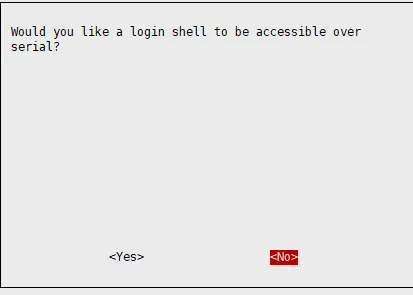
When asked “Would you like a login shell to be accessible over serial?”, select No.
-
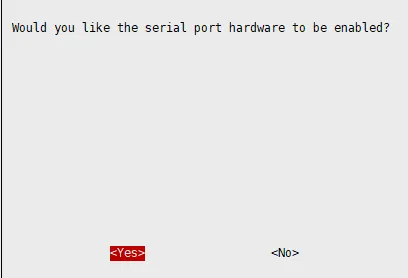
When asked “Would you like the serial port hardware to be enabled?”, select Yes.
-
Finish and reboot.
After rebooting, verify the serial device is present:
ls -l /dev/serial*You should see a symlink like /dev/serial0 -> ttyS0 or /dev/serial0 -> ttyAMA0.
Install Dependencies
Section titled “Install Dependencies”Raspberry Pi OS Bookworm ships with lgpio and has dropped support for the older RPi.GPIO and wiringPi libraries. For most users, the Python dependencies are sufficient:
sudo apt-get updatesudo apt-get install -y python3-serial python3-can python3-rpi-lgpioThe demo scripts from Waveshare run directly with these packages.
Install the BCM2835 C library for low-level GPIO access:
wget http://www.airspayce.com/mikem/bcm2835/bcm2835-1.75.tar.gztar zxvf bcm2835-1.75.tar.gzcd bcm2835-1.75/sudo ./configure && sudo make && sudo make check && sudo make installcd ..Then install Python dependencies:
sudo apt-get updatesudo apt-get install -y python3-serial python3-canwiringPi is no longer maintained upstream but some of the Waveshare C demos depend on it. Install the community fork:
cd /tmpwget https://project-downloads.drogon.net/wiringpi-latest.debsudo dpkg -i wiringpi-latest.debVerify the install:
gpio -vIf you need lgpio on an older OS release, build from source:
wget https://github.com/joan2937/lg/archive/master.zipunzip master.zipcd lg-mastermakesudo make installVerify CAN Setup
Section titled “Verify CAN Setup”After rebooting with the SPI overlay enabled, check that the kernel recognized the MCP2515:
dmesg | grep -i '\(can\|spi\)'You should see lines indicating the MCP2515 was probed successfully, something like:
[ 5.sp1234] mcp251x spi0.0 can0: MCP2515 successfully initialized.
If you see errors about failed SPI communication, double-check that the HAT is seated properly and that the oscillator frequency in your overlay matches your board’s crystal.

You can also confirm the can0 network interface exists:
ip link show can0Download Demo Code
Section titled “Download Demo Code”Waveshare provides example code for both C (wiringPi) and Python. Download and extract:
sudo apt-get install -y unzipwget https://files.waveshare.com/upload/4/4e/RS485_CAN_HAT_Code.zipunzip RS485_CAN_HAT_Code.zipsudo chmod 777 -R RS485_CAN_HAT_Code/cd RS485_CAN_HAT_Code/Next Steps
Section titled “Next Steps”With the HAT physically installed, kernel overlays loaded, and dependencies in place, you are ready to start sending data. The CAN Bus Usage guide covers bringing up the can0 interface and exchanging frames. The RS-485 Usage guide walks through serial communication with the SP3485 transceiver.